First, I'm back. very sad to say that I left away due to other things plus taking care of my little boy.
I'm now running my own company to provide software development/solution to other companies. It's a fresh start for me, lots of challenges ahead.
Right, back to the main purpose of this post. As I'm running a company therefor I need to keep my personal emails and business emails separately. So I setup a domain and purchased couple of years online web service to start building my website, and I also need to setup emails accounts base on my domain to promote my business.
There are four main issues come across to me:
- I need to keep all my emails at least for 6+ years but there is no guarantee the web hosting provider will last that long and I need to manage email backups myself which could be a extra task and painful.
- I may decide to change my business web domain then I'm running a risk of loosing the previous emails. Plus I want to keep all emails together so I don't have to setup multiple email accounts on my Mac.
- I need to setup multiple email account on my lovely iPhone/iPad which i don't like to do it either.
- I want to have just one mail account to view/compose/reply to all my emails but with different domains that's not possible.
Certainly people will say - why not consider Google mail for business? Yes, that resolved issues of point 1 & 2, but it doesn't resolve point 3 & 4.
Eventually after very carefully scan through the Gmail settings I come up a perfect solution to address theses issues and I think you may need it as well. Here are the steps:
Prepare:
For people who needs to implement this solution I'm sure it won't be a issue to have these ready:
- register and domain and purchase a web host with email support features (most of the web hosting does this)
- get a gmail account, if you are a dedicated Yahoo!, Micrsoft mail user you can still keep reading it cause you might be able to do it on these email accounts. (I only use Gmail, the best ever)
- configure couple of email accounts on you domain and make sure you can send/receive emails
Let's assume the business email is: support@one-tech-a-day.com
and the Gmail account is: personal@gmail.com
Web Hosting Email forwarding setup:
First we need to let the hosted mail server forward all received emails on support@one-tech-a-day.com to personal@gmail.com. To do that you need to (here is just a example):
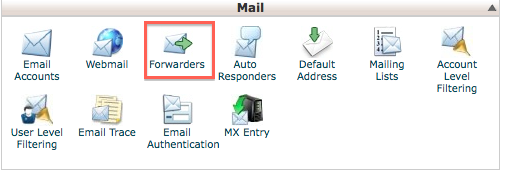
Login to your web hosting admin console and find the forwarder setting

Click Add forwarder to add a new forwarding email address:
Now enter your support email address and gmail address to the correct fields, then click add:
Once the new config is added you can view it on the list:
Now, that's the email forwarding setup on your purchased domain and you should be able to receview all emails send to support@one-tech-a-day.com from now.
Once you're happy it's working, let's config the gmail account.
Setup Gmail to Send Emails:
Goto Gmail settings => Accounts and Import, then you will see then the
send mail as section:
click the add another email address your own to add a new email address:
click next step and make sure you choose Send through SMTP server option otherwise your client will see the text mail was sent on behalf xxx@yyy.com from xxx@gmail.com
click Add Account to finalise it. make sure you choose the option Reply from the same address to which the message was sent otherwise you will need to manually choose which email address you're going to reply to email.
That's all setup and you can now send/receive emails from your Gmail account. The last thing you might want to do is to label your business emails so you can easily view/search them.
Organise your business mails within Gmail
Go to Gmail settings => filter to create two filters, one for send and one for receive, please see the screenshots and then the mails will be auto organised when they arrive your gmail account.
for received emails:
for sent emails:
You can setup multiple email accounts to forward received mails to your gmail account and also setup multiple accounts to allow gmail to send emails out. Now gmail becomes your cloud base mail agency. It keeps all emails for you for years and years and you never needed to worry about backup and loss your important business emails.
Once these all setup then the settings automatically pushed to the gmail application on our iphone/ipad/android phone. From now one you only need to setup one mail account on your iPhone. That's really cool.
That's it. I'm hoping this helps you. Please let me know in the comments :-)


